

Supplies needed:
fabric - enough to make 100 3x3 squares
one Styrofoam cone - 5 1/2" x 10 -12"
100 fern pins
one bag polyfil
 Start by cutting 3" x 3" squares. The tree will use approximately 100 total. I have used four different fabrics from 12 Days of Christmas by Kate Spain. This would also be a great project to use your scraps.
 Pinch off a ball of polyfil about the size of a large cotton ball. Place it in the middle of one square on the wrong side of fabric.
 Have your Styrofoam cone nearby.
 Select one fern pin from the bag. These can be found in the floral supply section of a local craft store.
 Fold two corners of the square together. Push the fern pin threw both layers of fabric.
 With the pin pushed about three quarters of the length threw, rotate the pin to pick up the next corner. Push the fabric all the way to the top of the fern pin.
 Next, flip the pin to pick up the remaining corner. Push the fabric down to form a tight puff.
 If done correctly, it will look like this. It may take a few attempts to perfect your technique. If you don't like the way it looks, take the fern pin out and try again.
 Once satisfied with your puff, start at the bottom of the cone and push the fern pin into the cone.
 You want to position them close enough so the fabric puffs are touching.
 Once the bottom row is finished, start on the second row by staggering the first puff between two puffs.
 Continue around the cone repeating this step. Each puff does not need to be the exact same size.
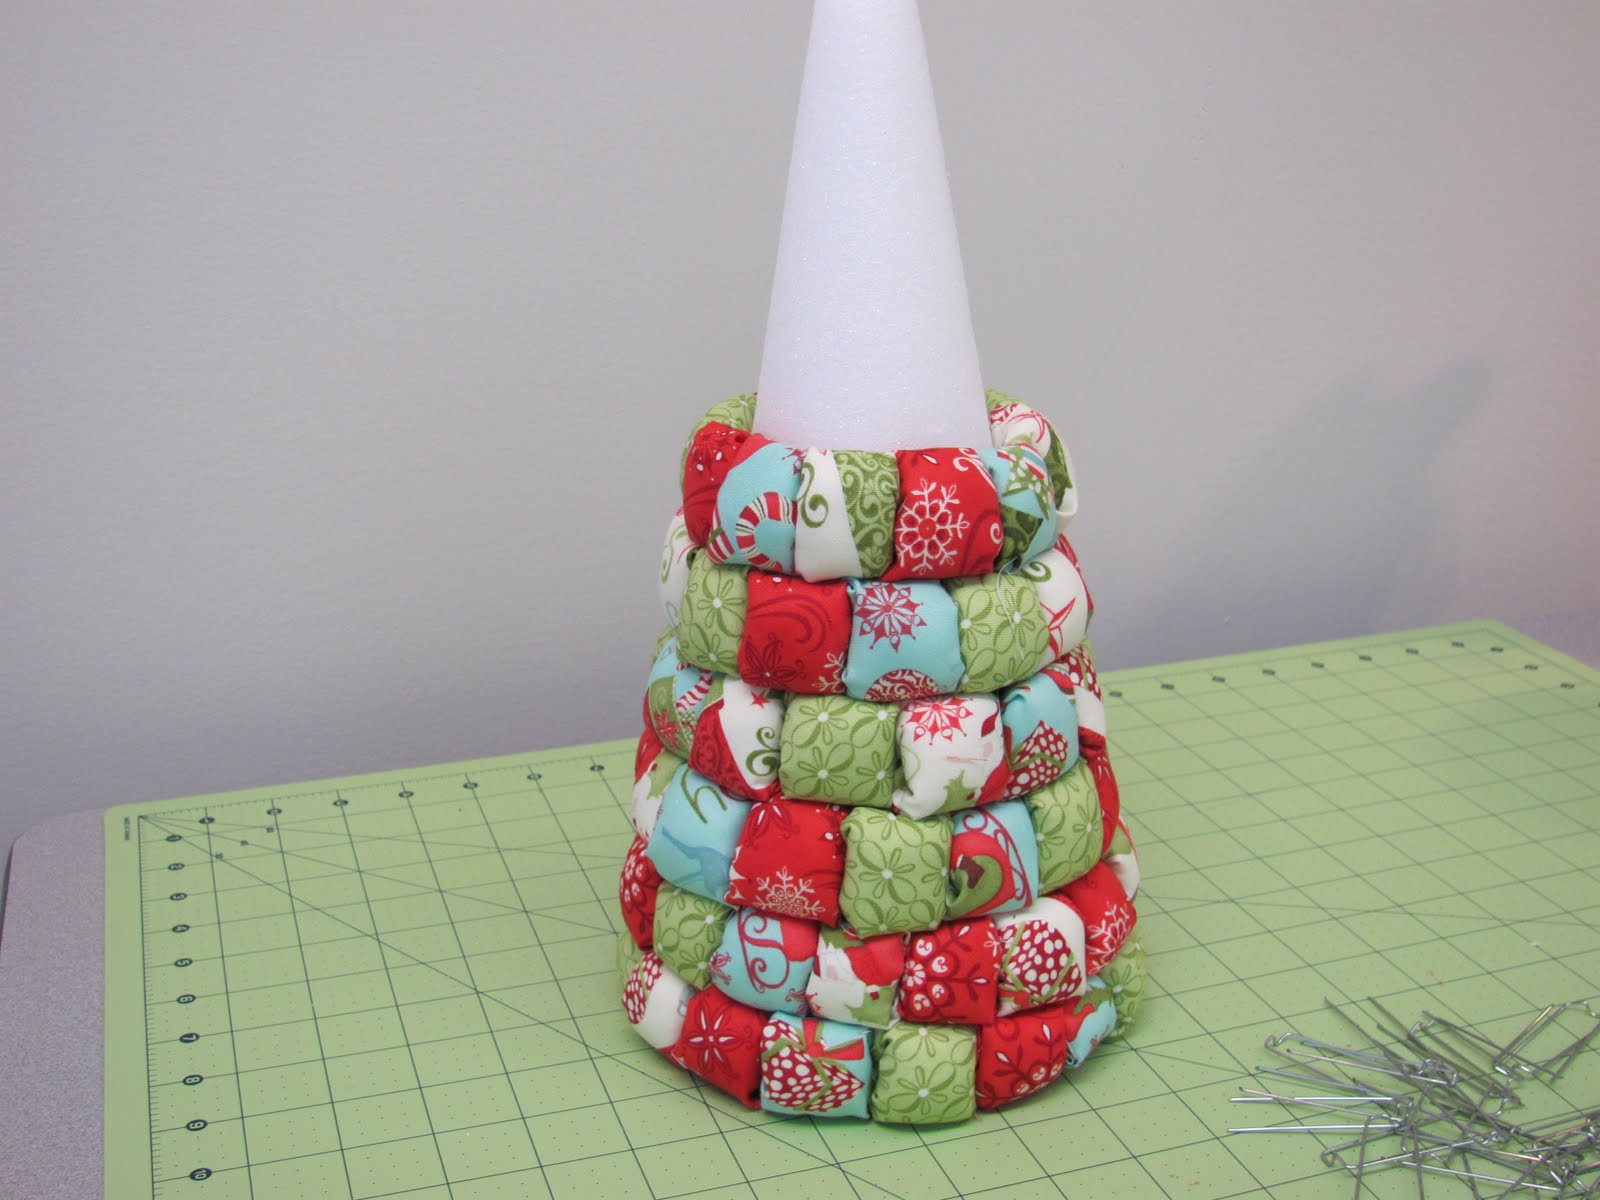 Continue up the tree in the same fashion.
 The cone narrows as you get closer to the top. To avoid the pins coming through to the other side, start pushing the pins in at a downward angle.
 Once a row is complete, use both hands to shape it tightly.
 Don't worry if a loose edge is showing.
 Simply take your finger and tuck the fabric in between the two puffs.
 Once you get to the very top, I like to take a piece of fabric, matching the puff that will be used on top, to first cover the point. This way, the white styrofoam will not be showing. Simply lay it on top and use a few straight pins to hold it in place.
 Then push your final puff straight down.
 You may want to add garland or bows to the tree. Simply use a straight pin to hold them to the puffs. Total time to complete: approximately one hour. For an easy no sew wreath, click HERE.


2 comments:
So very CUTE! Thanks for the tutorial!
Very,Very nice.Supeeer.
Post a Comment